
How do I complete corrections?
The Findings and Actions feature allows buyers and auditors to communicate clarifications or corrections to your submitted answers. If you have received corrections, you can review and make edits to the answers.
You are notified of any corrections via email, which contains all corrections assigned that day. Logging in to your account before the email is received still grants you access to the corrections requested.
There are two ways to respond to assessment corrections:
Responding in the assessment
- Click the menu icon
 in the top left corner.
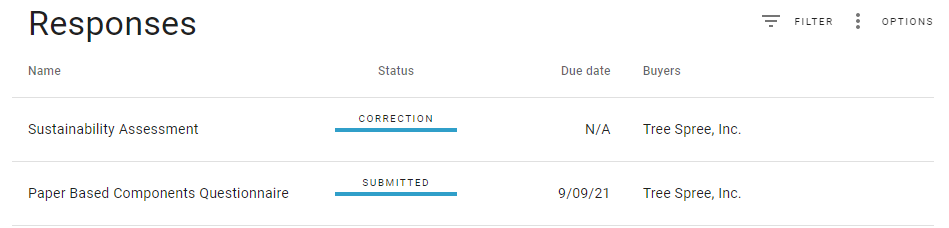
 - Click Responses.
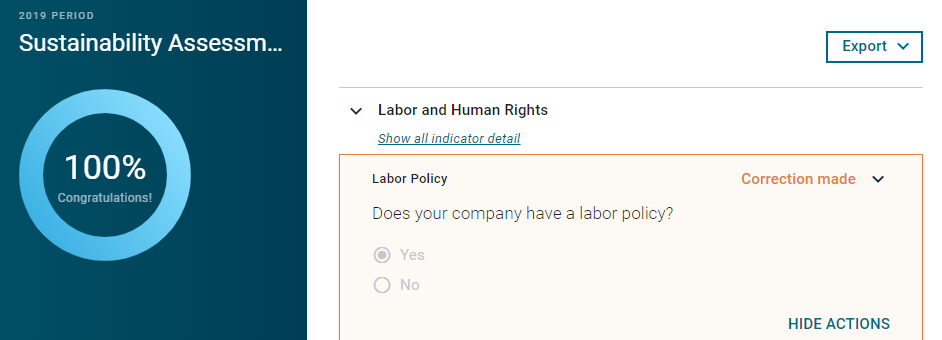
- Select the assessment with Status Correction.
 in the top left corner.
A notification displays at the bottom of your screen with the number of corrections requested in that assessment.

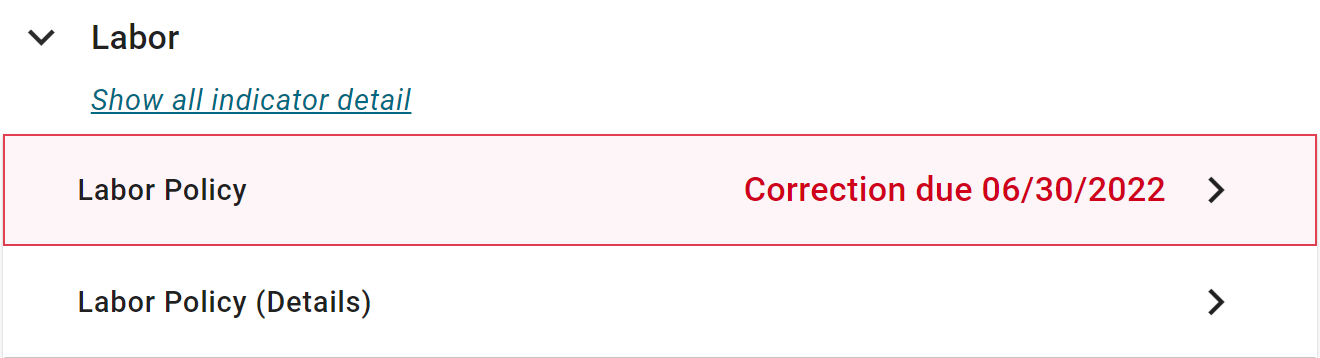
- Select the indicator with the requested correction.
The due date for the correction is displayed to the right of the indicator.
- Click SHOW ACTIONS, if the Action required is not visible.
- Edit the response and add comments or documentation by clicking the overflow icon
 on the right-hand side of the correction.
 - If you need to remove a document, select the delete icon
 next to the file name under Documentation.
 next to the file name under Documentation.
Note that any comments written in the 'Action taken' box and documents uploaded under 'Action evidence' will not be visible after the buyer accepts the correction. Please add all comments and documents by clicking the overflow icon  on the right-hand side of the correction.
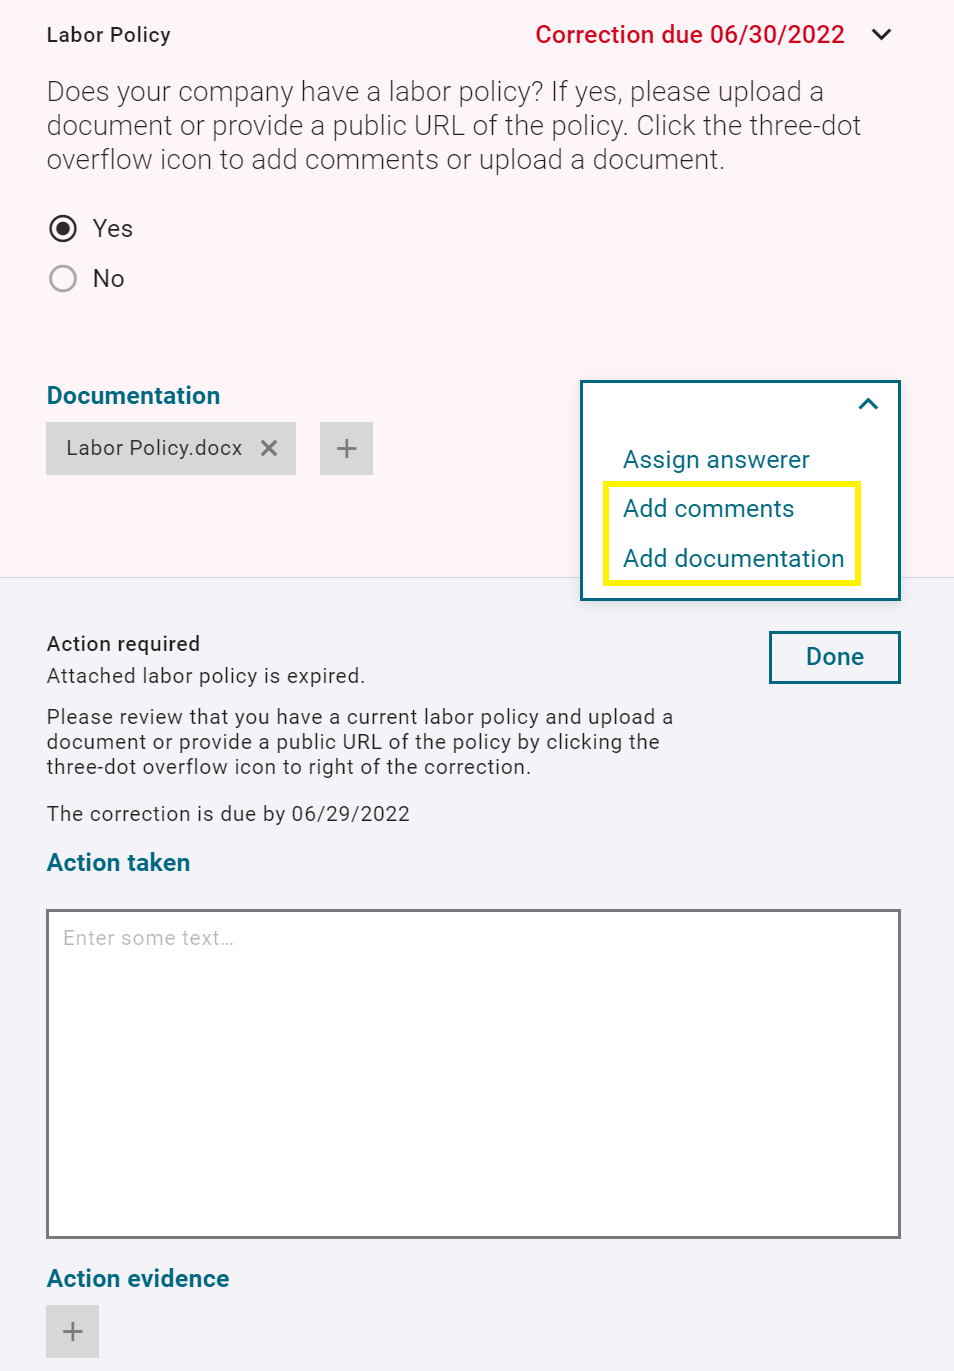
- If necessary, assign an Answerer to make a correction. Answerers are only able to see and edit indicator(s) assigned to them.
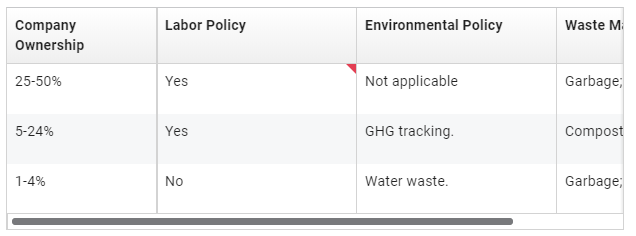
- To answer indicators in a matrix table, click on the indicators with a small red triangle in the top right corner of the cell.
- Follow the same steps as above to respond to a matrix table correction (see above).
The assigned Answerer receives an email with a link to access the SupplyShift platform.
When a correction has been made, the triangle changes to orange.
- Click Done in the Actions required box.
Corrections cannot be edited after clicking Done for that indicator.
- Click OK to notify the buyer of your corrections.
- Repeat this process for all corrections needed.
Your buyer is notified via email, which contains all your corrections.

Once a correction is completed, the indicator displays a status of Correction made in orange. The requesting buyer receives an email to accept or reject the correction. If the correction is rejected, another correction is placed on the indicator.
Responding in the Corrections module
- Click the menu icon in the top left corner.
- Click Corrections.
Check the button 'for you' to display the corrections assigned to you.

- Click on a correction to open it.
The correction content is displayed. The Finding tab shows by default.
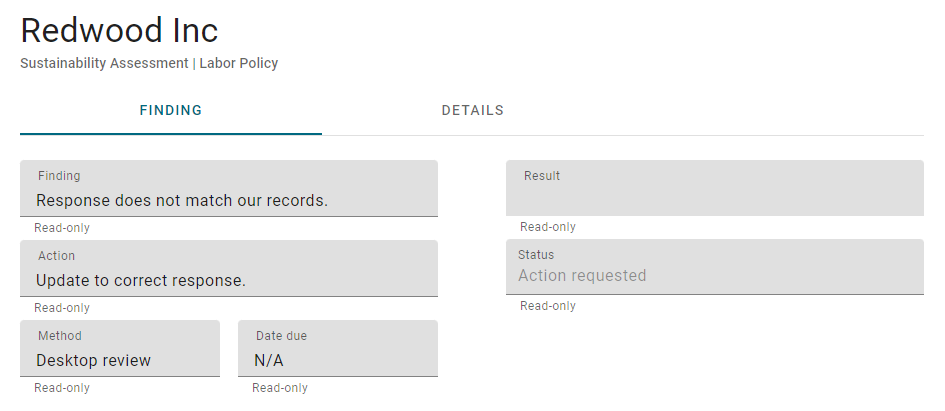
- Review the Finding tab content.
- Click the Details tab.
This information has been written by the buyer describing the reason for the correction assignment.
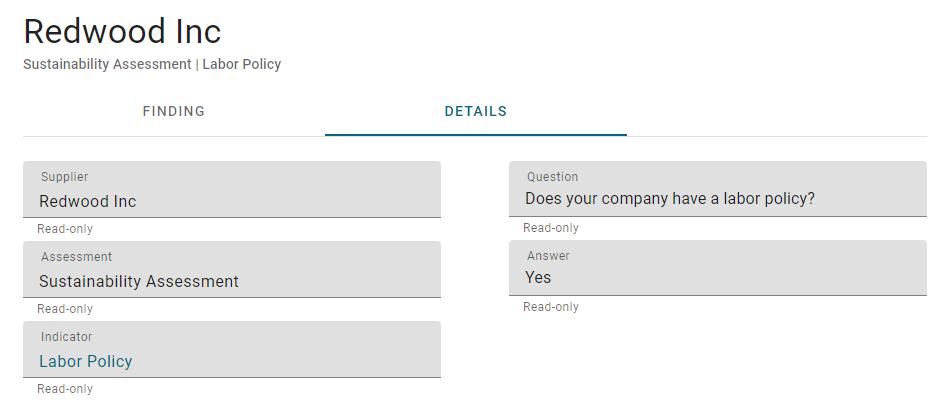
- Review the Details tag.
- Click the question title link located in the Indicator field.
- Click SHOW ACTIONS, if the Action required is not visible.
- Edit the response and add comments or documentation by clicking the overflow icon on the right-hand side of the correction.
- If you need to remove a document, select the delete icon next to the file name under Documentation.
This page contains information about the correction: assessment title, question title and description, and the answer provided.
The assessment opens, displaying the question that has the correction.
Note that any comments written in the 'Action taken' box and documents uploaded under 'Action evidence' will not be visible after the buyer accepts the correction. Please add all comments and documents by clicking the overflow icon on the right-hand side of the correction.
- If necessary, assign an Answerer to make a correction. Answerers are only able to see and edit indicator(s) assigned to them.
- To answer indicators in a matrix table, click on the indicators with a small red triangle in the top right corner of the cell.
- Follow the same steps as above to respond to a matrix table correction (see above).
The assigned Answerer receives an email with a link to access the SupplyShift platform.
When a correction has been made, the triangle changes to orange.
- Click Done in the Actions required box.
Corrections cannot be edited after clicking Done for that indicator.
- Click OK to notify the buyer of your corrections.
- Repeat this process for all corrections needed.
Your buyer is notified via email, which contains all your corrections.
Once a correction is completed, the indicator displays a status of Correction made in orange. The requesting buyer receives an email to accept or reject the correction. If the correction is rejected, another correction is placed on the indicator.