
Add rating profiles to assessments
Scoring is the process of assigning numeric values to indicator responses and using those values to create ratings or scores to analyze responses in a qualitative way. Buyers can add and change rating profiles without assistance from SupplyShift staff.
Rating profiles should only be applied to an assessment once it is completely finalized. It can also be added and adjusted after the assessment has been sent to suppliers.
Create a rating profile
- Click the menu icon
 on the top left corner.
 - Click Assessments.
- Select an assessment to edit.
- Click Rating Profiles.
- Click Add rating profile.
 on the top left corner.
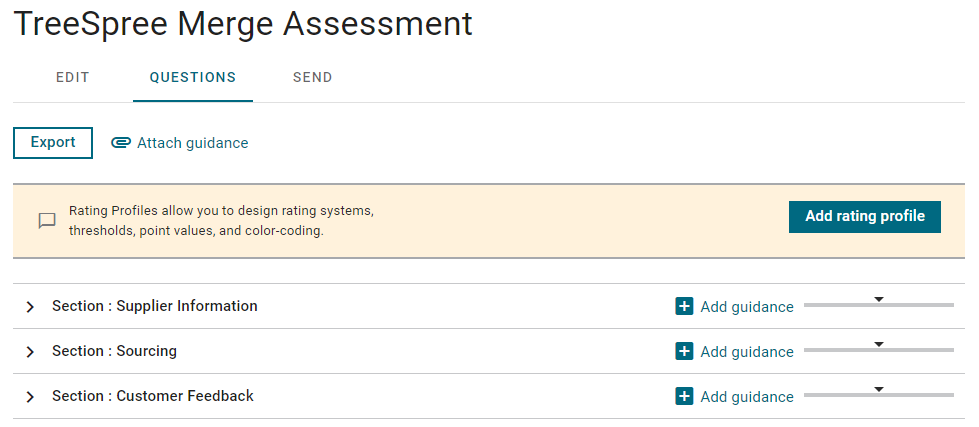
- Click the overflow menu to change the name of the rating profile and add a description.
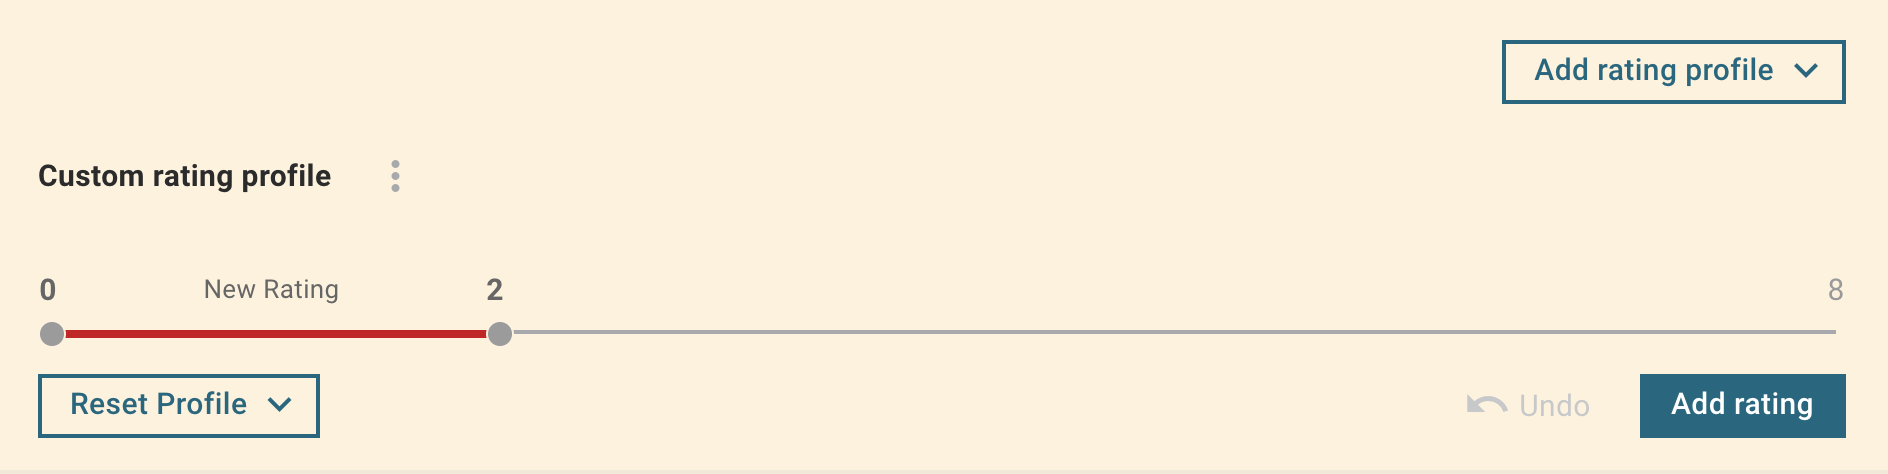
- Click the double arrow icon on the right to customize ratings.
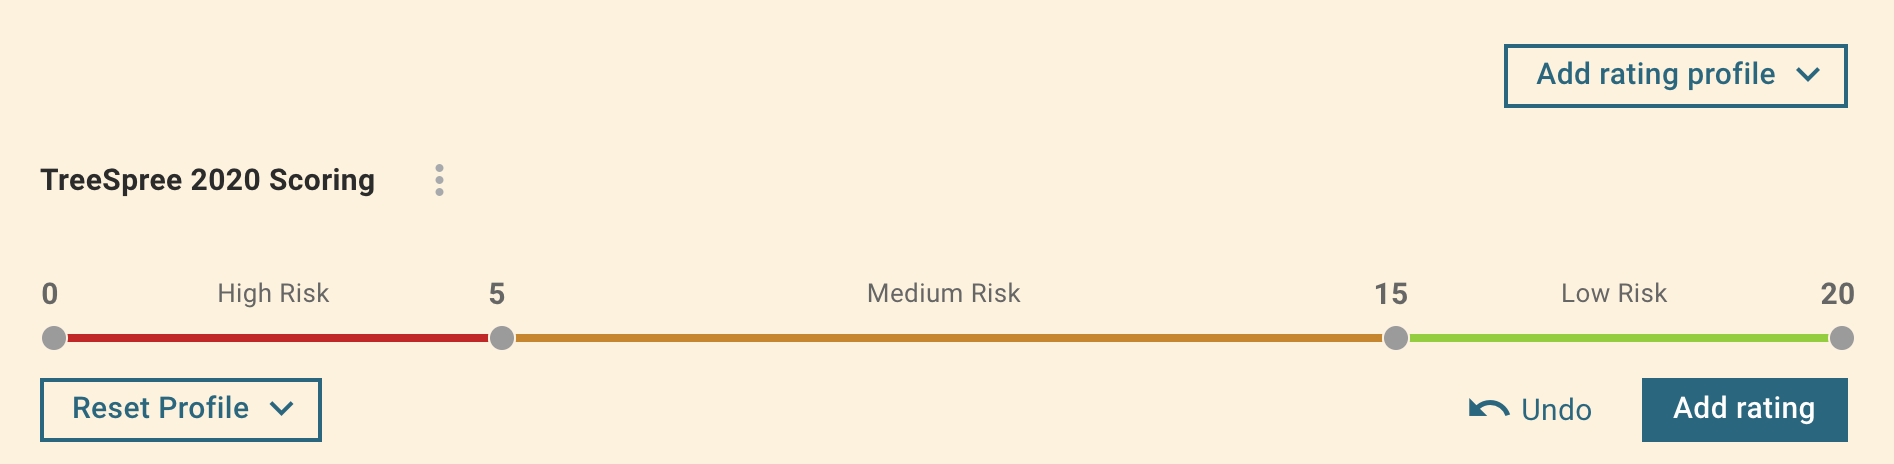
A rating range scale is displayed. It populates as you add points to the indicators.

- Select Sum (pts) or Percentage.
- Select Rating Visibility to Suppliers.
If you want suppliers to see their scores before submission, you need to select a visibility option in the custom scoring drop-down AND check the “Show Ratings Pre-Submit” box when you send the survey.
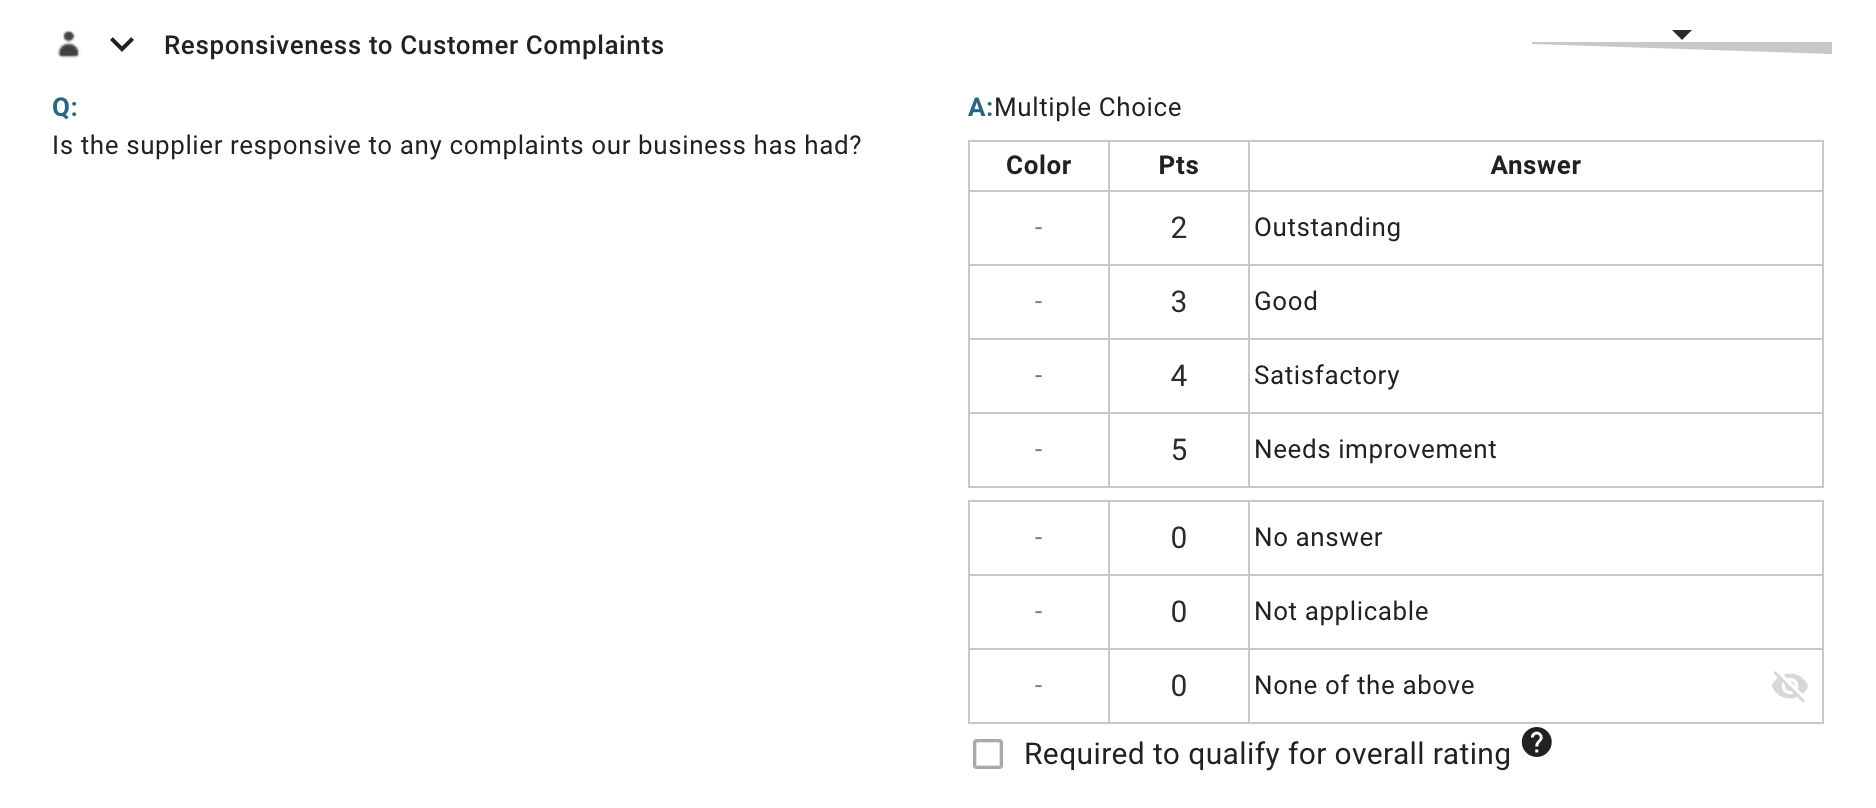
- Add the amount of points to each desired indicator and answer.
Not all indicators need to be given points. Points can be positive, negative, or zero. For multi-select indicators, points accumulate when multiple options are selected.
Be sure to save regularly to prevent losing progress.
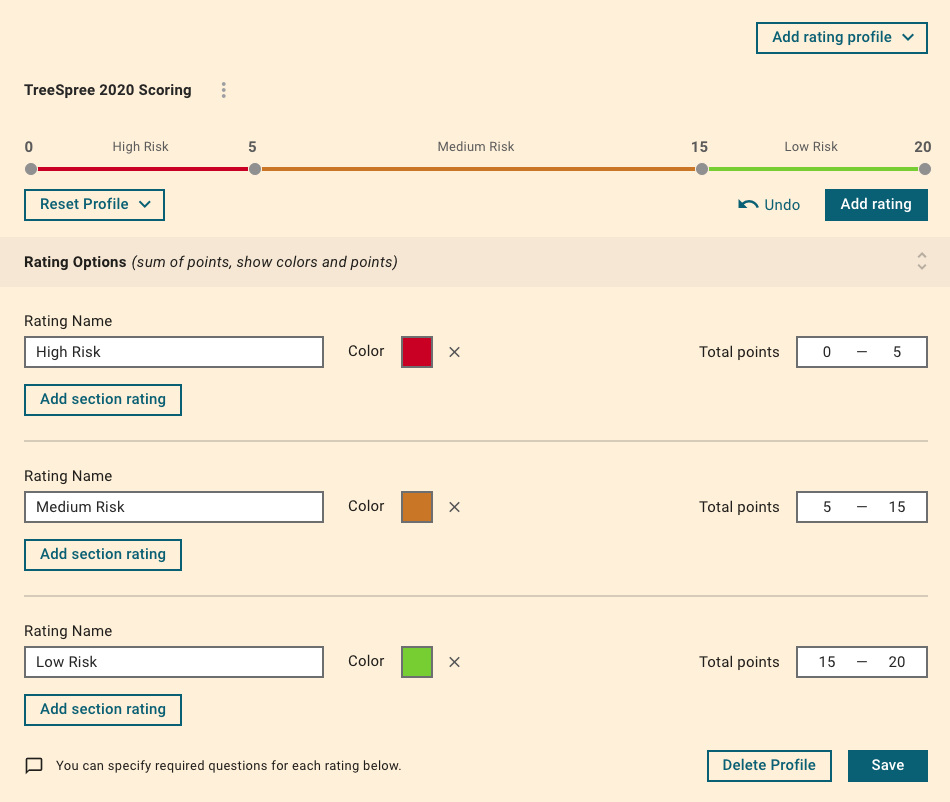
- Click Add rating to establish the point ranges required for each overall rating.
Helpful Tips:
- You can have multiple scoring profiles to create different ranges and groups.
- You can change the name and color of each rating profile as well as the points for each.
- Points must overlap between rating profiles.
- Your minimum point value will fall under the score below.
- You can manually enter point values for each rating or adjust the points on the bar at the top of the dashboard.
Add Section Ratings
Section Ratings enable you to assign ratings for each section of the assessment.
- Click Add section rating.

- Select a section.
- Add a point range for the selected section.
Add Colors to Indicators
When ratings and colors have been set in the rating profile dashboard, return to the indicators where you can add colors for the answer options. This is optional.
- Select an indicator.
- Click the box under Color.
- Select a desired color from the options for answers.
Color options are the same as the colors assigned to Ratings.
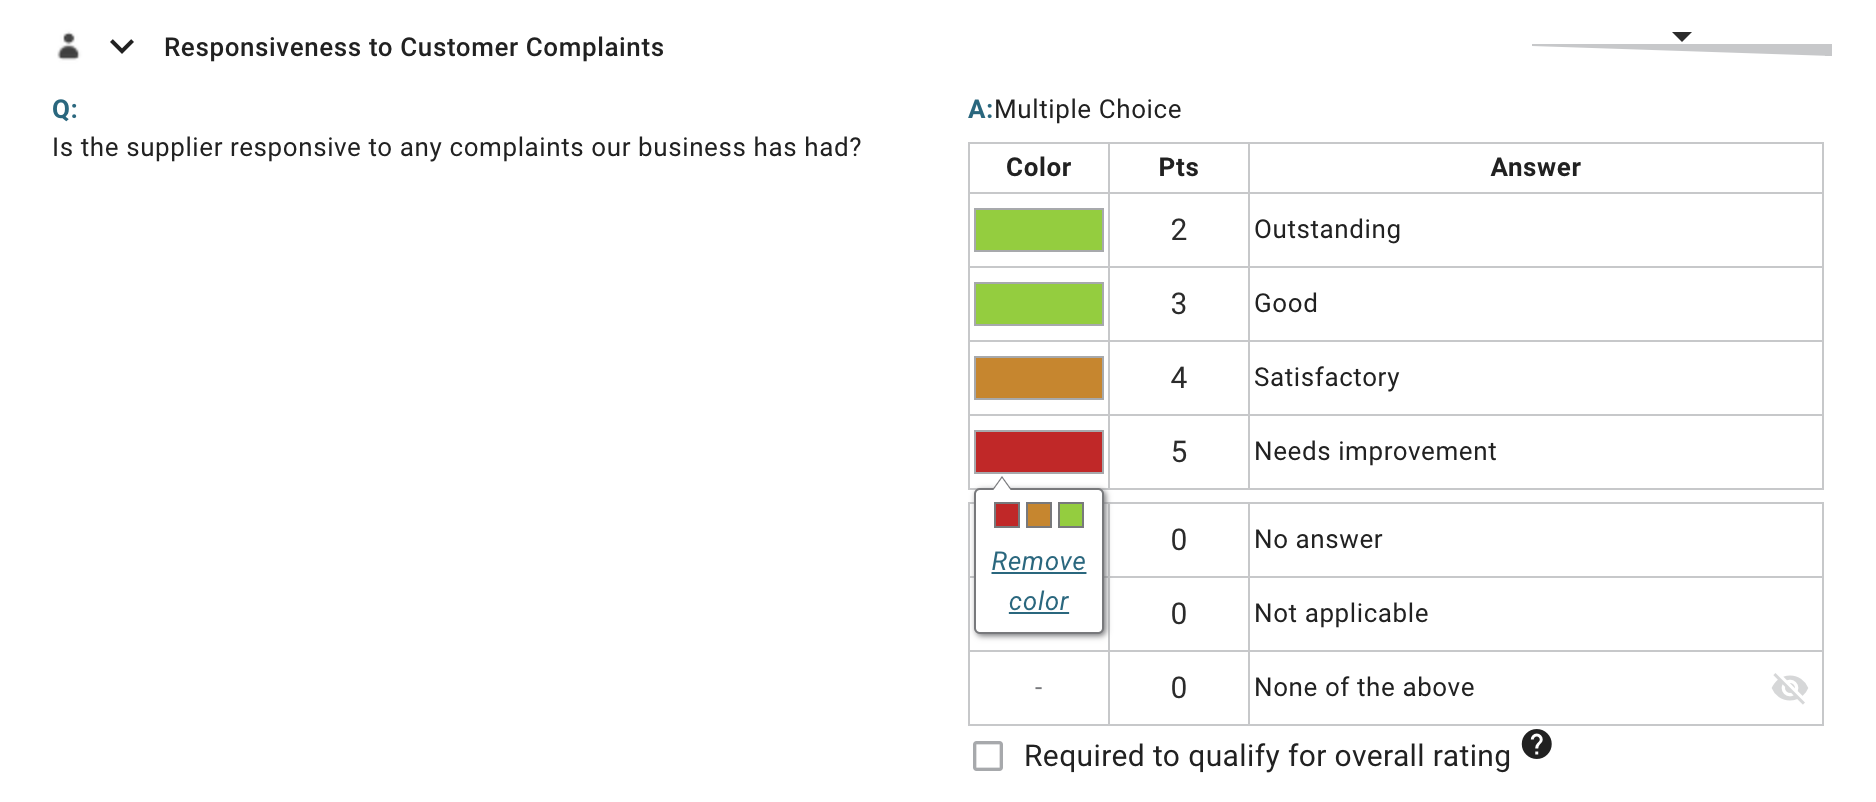
- Click Save.
Clear Ratings and Points
Reset the rating profile to remove ratings, colors, and points.
- Click Reset Profile and choose an option from the drop-down list.
- Clear profile removes all ratings, colors, and set the score for each response to 0.
- Clear all indicators removes all colors for each response, and set their points to 0.
- Reset to Default Values removes all ratings, colors, and set the score for each response to their default values.
For custom scoring on a matrix table, consult a member of the SupplyShift team for more information.