Add segments to assessments
Segments are a property of the assessment response. Segments allow suppliers to classify their response(s) by a set of predetermined options. Each of these options is called a segment, and they are defined by the buyer before the assessment is sent. When you add segments to an assessment, your supplier is able to choose them when answering.
When used in tandem with multi-tier, suppliers who forward an assessment with segments also have the ability to rename them for their suppliers to add granularity to responses.
This article provides guidance on how to:
- Create segments
- Send an assessment with segments
- View segments in comparisons
- Filter by segment in Analytics
Create segments
- Click the menu icon
 in the top left corner.
 - Click Segments and Tags.
- Click the
 icon.
icon.
 in the top left corner.
The Segments page is displayed by default.
 icon.
icon.The Create segment dialog box is displayed.
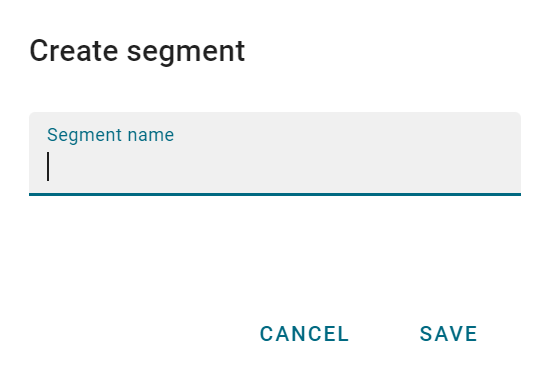
- Enter the segment name.
- Click Save.
A segment can only be deleted from the Segments and Tags page if it has not been sent in an assessment.
Send an assessment with segments
Once you have created your segment(s), you can apply them to an assessment send. Suppliers can choose the segment(s) that are relevant to their responses. Suppliers also have the option to respond to segments individually.
- Click the menu icon in the top left corner.
- Click Assessments.
- Select the assessment that you would like to send.
- Select the Send tab.
- Click Advanced options.
- Enter the segment name in the field provided.
- Choose the segment from the list.

- You can add new segments by following the steps listed here.
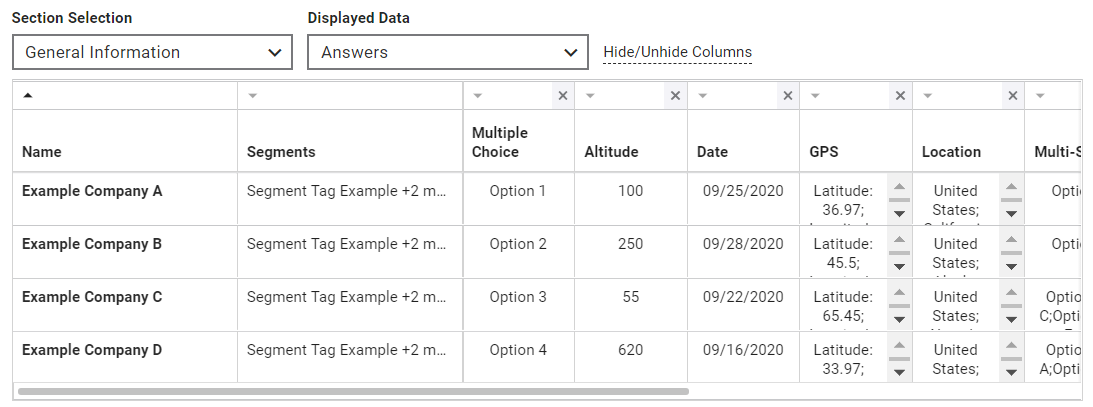
View segments in comparisons
Suppliers can see segments in Publish Comparisons.
- Click the menu icon in the top left corner.
- Click Comparisons.
- Select the comparison you want to view.
- Click on a segments cell to view the segment(s) that were included in the company's response.
Segments are denoted in the column Segments.
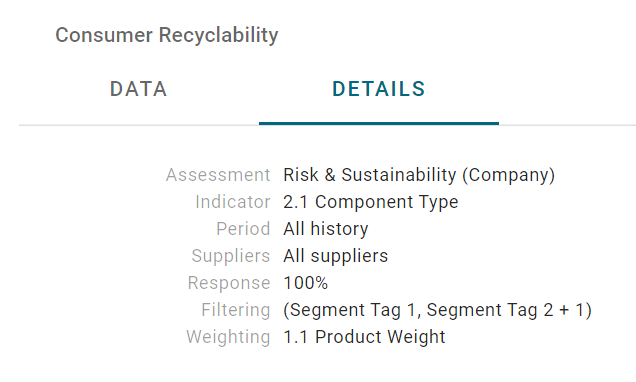
Filter by segment in Analytics
Suppliers can see segments in Published Analytics. Learn more about creating analytics here.
- Click the menu icon in the top left corner.
- Click Analytics.
- Click the icon .
- Define your Chart Type, Data Source, Participants, and Date Range.
- Use the Filters option to select the segments.
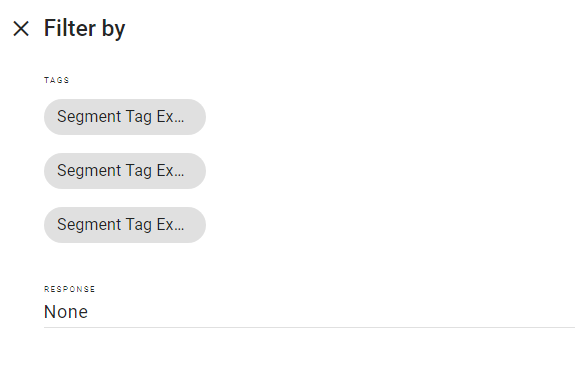
- You can select multiple segments, if necessary.
- Click View Data to view selected segments.
- Click Details.