
Track multi-tier assessment responses
The assessment tracker is used for viewing assessment responses of your indirect suppliers across multiple tiers. To track responses of your direct suppliers, view this article.
This article guides you how to:
- Create assessment tracking
- Add an assessment to the tracker
- Remove an assessment from the tracker
- Rename a tracking report
Create assessment tracking
- Click the menu icon
 in the top left corner.
 - Click Assessments.
- Click Assessment Tracker.
 in the top left corner.
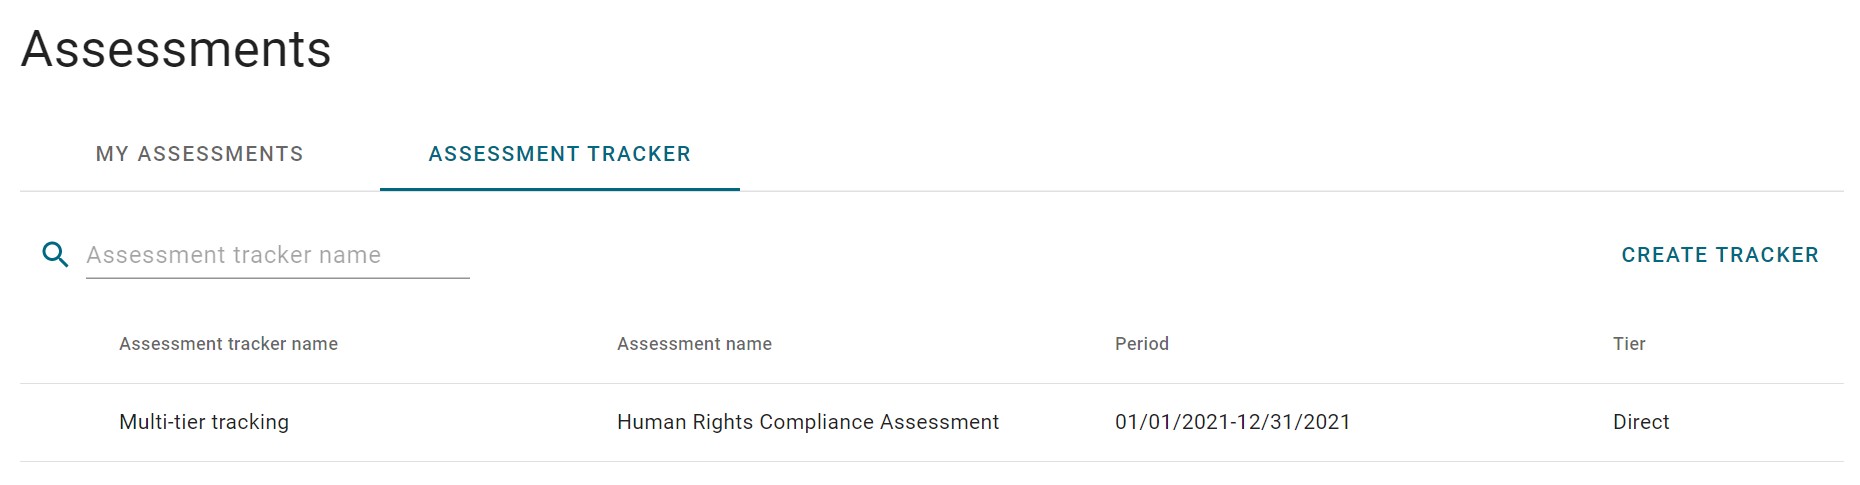
- Click Create Tracker.
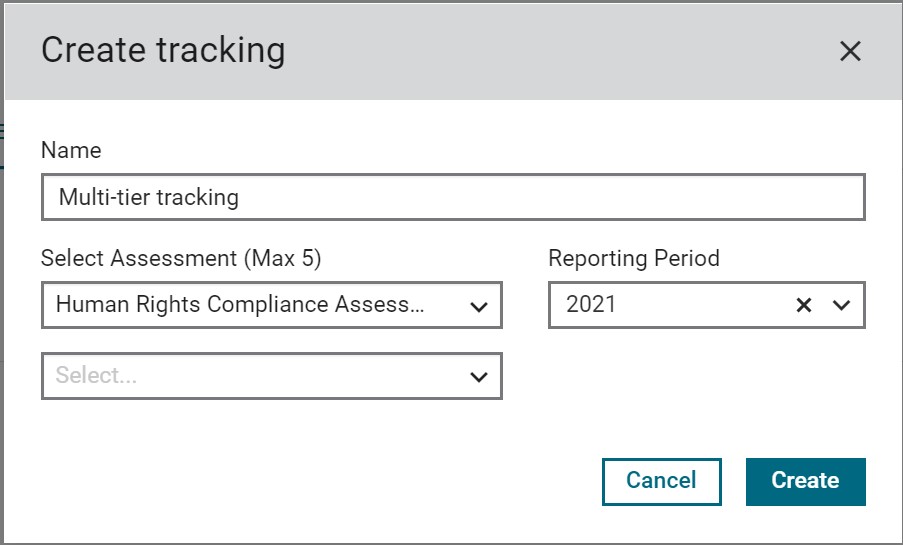
- Name your report.
- Select the desired assessments to track from the drop-down list.
- Select a reporting period for each assessment.
- Click Create.
The Create tracking dialog box is displayed.
- Click the over flow icon
 next to the assessment to edit the reporting period and color.
 - Click on the supplier name to see additional information about status.
- (Optional) Add notes about the status or the supplier.
 next to the assessment to edit the reporting period and color.
If the assessment has been forwarded, the company is displayed with the name of the supplier until that supplier has submitted and shared the information with the buyer.
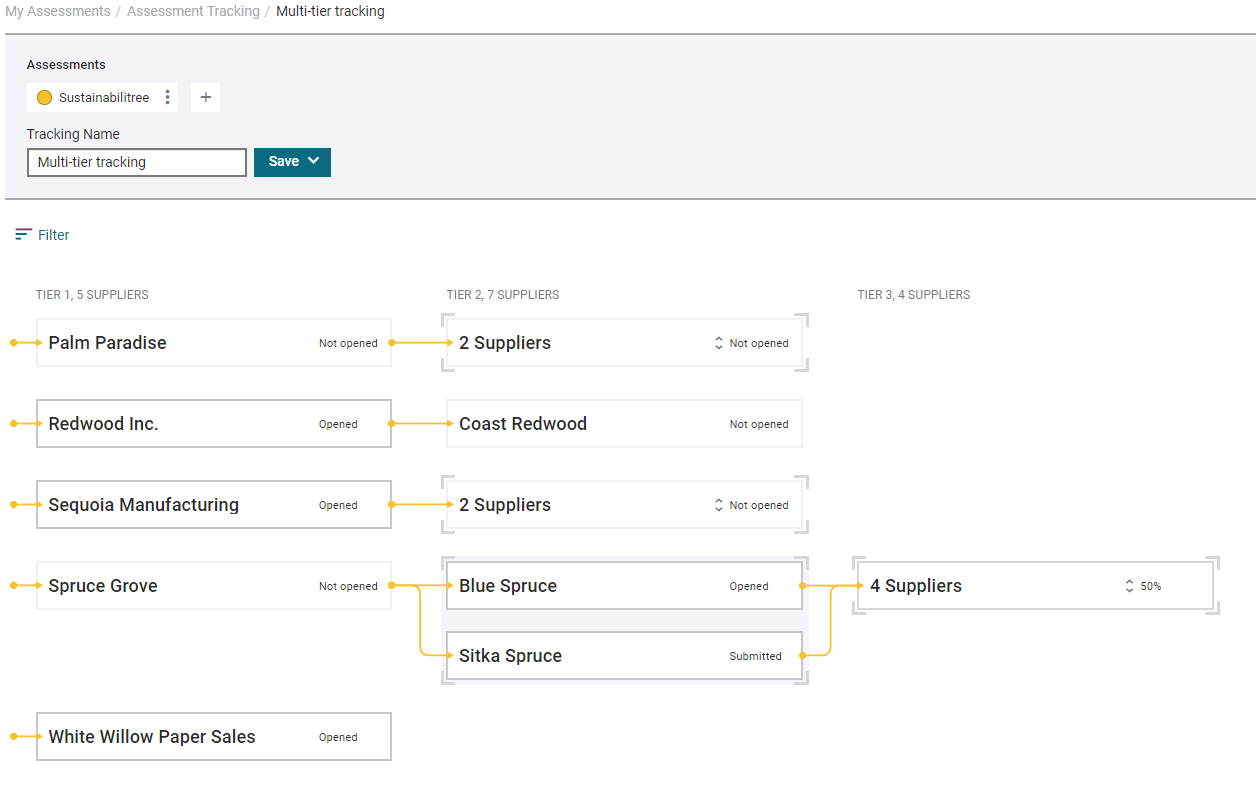
- Click Save.
- Return to the Assessment tracking page to find your saved reports.
Add an assessment
- Click the + icon in the gray bar at the top of the tracker.
The Add assessment dialog box is displayed.
- Select the assessment from the drop-down list.
- Click Add.
- Follow the steps above for each additional assessment.
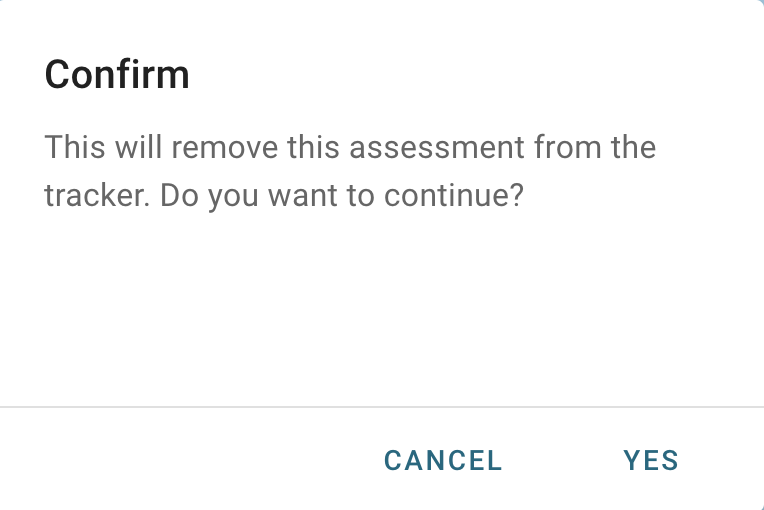
Remove an assessment
- Click the overflow icon next to the assessment you want to remove.
- Click Remove Assessment from the list.
- Click Yes in the Confirm dialog box.
You can only remove an assessment if there are two or more assessments on the tracking report.
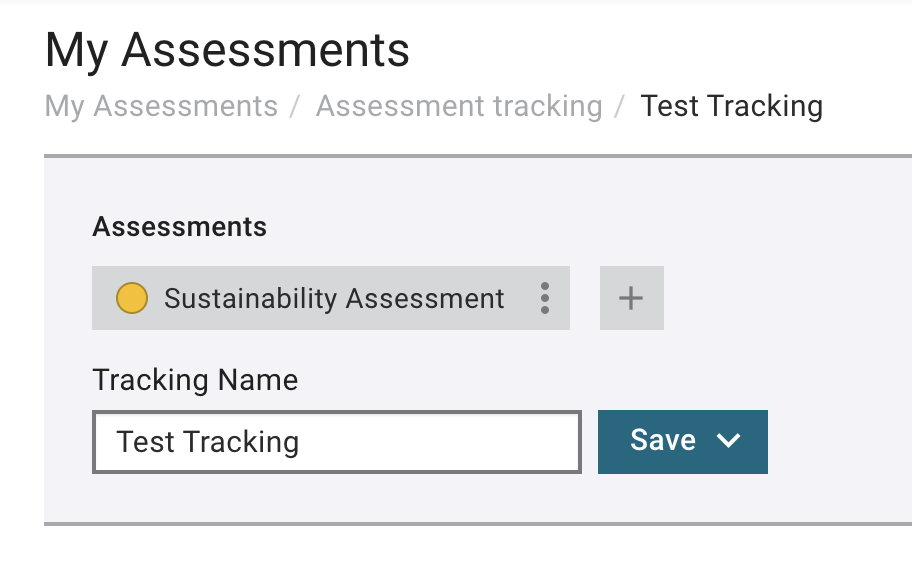
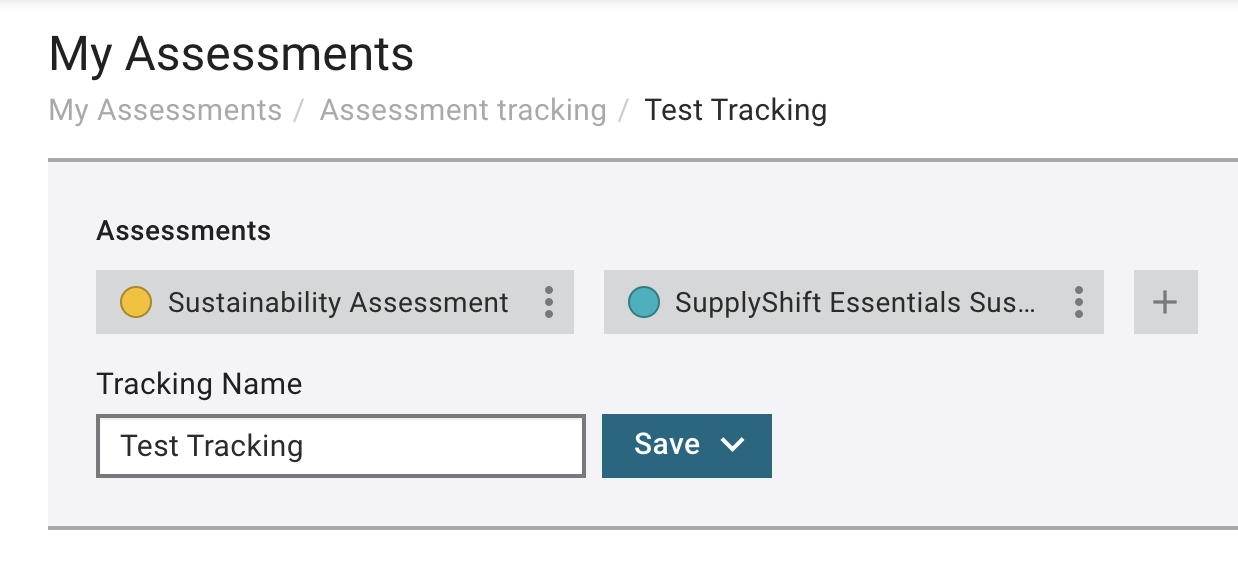
Rename a tracking report
- Enter the new name in the Tracking Name field.
- Click Save.
- Choose Save or Save as New.